Recipes

Vegan Fluffy Chocolate Chip Buttermilk Pancakes

Pancakes have always been my favourite breakfast food! But ever since I went vegan, I had trouble finding a plant-based recipe that I actually liked. I found that some recipes lacked flavour, while others produced pretty flat looking pancakes (which isn’t my thing)!

Until, I found a recipe online and modified it! It turns out that the secret to fluffy and delicious buttermilk style pancakes is actually apple cider vinegar. When you combine apple cider vinegar with milk, it produces somewhat of a thick mixture that is perfect for achieving that cloud like texture that I’ve been craving!

This recipe is actually pretty simple and easy to make. I made sure to only include ingredients that most people already have at home, with the exception of apple cider vinegar. So without further ado, here’s your new favourite plant-based breakfast recipe!
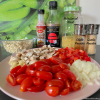
Ingredients:

  • 1 cup of plant-based milk (I used Vanilla Almond Milk)
  • 1 teaspoon of apple cider vinegar
  • 1 cup all purpose flour
  • 2 tablespoons brown sugar
  • 1 tablespoon butter (+ a bit extra for cooking)
  • 2 teaspoons of baking powder
  • 1/2 a cup of chocolate chips

Directions:

  1. Start by combining the milk and apple cider vinegar in a small bowl. Set aside and let sit for at least 5 minutes, while you measure out the dry ingredients.
  2. In a large bowl, combine the flour, brown sugar, butter and baking powder. Mix until all of the ingredients are blended together.
  3. Add the milk mixture into the large bowl of dry ingredients and mix using a whisk. Be sure to smooth the batter out as much as possible! Once the batter is smooth, add in the chocolate chips.
  4. Prepare a lightly buttered pan on medium heat and use a big spoon to scoop your pancake into the pan once it’s heated.
  5. Flip using a spatula after about 4 minutes, or until the underside looks golden brown.
  6. Let cook for an additional 3-4 minutes and remove from heat.
  7. Serve hot with maple syrup, fresh fruits and icing sugar!

Quick Tips:

  • If you want your pancakes to be extremely fluffy, try using an electric mixer instead!
  • Using vanilla flavoured milk will make your pancakes taste better.
  • Make sure the pan is fully heated so the pancakes bubble a bit on the sides when you add them in!

Recipes

Healthy & Delicious Juicing Recipes

I recently posted a blog on how to eat healthy on a budget, so today I wanted to share 3 healthy, delicious and affordable juice recipes that you can make at home!

Drinking fresh fruit juice has several health benefits which include boosting your immune system, promoting digestion and aiding weight loss. Many people’s concern when it comes to using a juicer is that the fiber is lost, however juicing is a great way to cleanse your body with high amounts of concentrated nutrients!

Here are three different juice recipes that not only taste great, but are amazing for your health!

1. Green Cucumber Cleanse Juice

This juice is great for detoxifying and cleansing your body πŸ₯’πŸπŸβœ¨

Cucumbers are a great source of antioxidants and minerals that keep you hydrated while promoting healthy digestion. Pineapple provides a tangy sweetness that combats inflammation and also aids in detoxifying the body. While the ginger provides a nice warming effect to boost immunity and neutralize the cooling effect of the other fruits. This juice will leave you feeling amazing, while nourishing your skin, hair and digestive system!

2. Ruby Red Antioxidant Beet Juice

This juice is great for your blood, cardiovascular system and liver πŸ’ͺ🏼πŸ₯•πŸ‹βœ¨

Not to be mistaken with radishes, beets are the red root vegetables responsible for the beautiful red pigment seen in this juice. Drinking beet juice has several health benefits such as lowering blood pressure and improving exercise stamina. Beets also contain betaine which support your liver by preventing fatty deposits from forming! And, this juice is perfectly sweet with the addition of carrot and lemon to neutralize the earthy flavour from the beets. Try drinking this juice in the morning to wake up your senses and promote healthy organ function!

3. Orange Carrot Carotenoid Juice

This juice benefits eye health, boosts immunity and promotes the look of healthy skin πŸ₯•πŸŽ ✨

Carrot juice is amazing for your skin because it contains Vitamin C and Provitamin A which protect your skin from free radical damage. Carrots also contain carotenoids which support eye health, boost immunity and promote liver health. Whereas the apples provide a nice sweetness that also reduce oxidative damage. The turmeric is great for reducing inflammation, redness and promoting the look of healthy skin. Needless to say, this juice will give you a beautiful natural glow!


Other common fruits and veggies that you can use for juicing:

  • Fruits: strawberries, blueberries, watermelon, honeydew, cantaloupe, grapefruit, oranges, papaya, mango, banana
  • Vegetables: celery, kale, spinach, leafy greens, parsley, cilantro, green & red pepper

Thank you so much for taking the time to check out my favourite juice recipes! Check out more recipes here and be sure to follow my Instagram page for updates!

Stay healthy and stay glowing ✨

Recipes

Tofu Scramble with Fresh Veggies

Having an egg or two for breakfast is surprisingly not that healthy. Just one egg has about 185 milligrams of cholesterol which increases your risk of cardiovascular disease by 6%. Luckily, there is a much healthier alternative in town that won’t cause you to compromise your tastebuds. This vegan scrambled egg recipe is full of flavour, tastes just like real eggs but is much healthier!

I really like this recipe because it contains about 28 grams of plant-based protein, is high in Vitamin B12 and contains so many vital nutrients such as phytoestrogen which has so many health benefits. And all you need is tofu, nutritional yeast, some spices and fresh veggies!

Here’s what you’ll need:

Ingredients:

  • 1 small white onion
  • 2 cloves of garlic
  • 4 mushrooms
  • Half of a red pepper
  • Half a container of cherry tomatoes
  • Β½ block of extra firm tofu
  • 4 tablespoons nutritional yeast
  • 1 teaspoon garlic powder
  • Β½ teaspoon chilli powder
  • Β½ cup of water
  • 2 tablespoons tamari or soy sauce
  • 5 drops of smoke flavouring

Preparation time: 10 minutes to prepare ingredients + 15 minutes cook time

Serving Size: Serves 1-2 people

Directions

  1. Start by preparing your ingredients: chop white onion, garlic, mushrooms and red pepper into small cubes. Cut the cherry tomatoes in half, set aside.
  2. Heat oil in a medium pan and stir in all of the veggies except for the cherry tomatoes. Let cook for a few minutes on medium heat.
  3. In the meantime, combine the nutritional yeast, garlic powder, chilli powder and water in a small bowl to make a paste.
  4. Using your fingers crumble the tofu into your pan while the veggies are frying. Mix together.
  5. Pour the nutritional yeast mixture into the pan making sure to distribute it evenly over the tofu.
  6. Add in the mini tomatoes, tamari and smoke flavouring.
  7. Mix all of the ingredients together and add in salt + pepper to taste.
  8. Cook for about 10 minutes and serve while hot with fresh avocados, toast and a smoothie! Voila, you have yourself a healthy breakfast πŸ™‚

Quick Tips:

  • When you’re buying tofu, make sure that it’s non-GMO. Genetically modified soy does not have the same health benefits.
  • I typically buy my nutritional yeast from Bulk Barn because it’s the most cost efficient. However, you can order nutritional yeast on Amazon and even find it at Whole Foods. To learn more about the health benefits of nutritional yeast, click here!
  • Other than that, have fun cooking this healthy and nutritious breakfast πŸ™‚
Recipes

Vegan Gingerbread Cookies

Gingerbread cookies are honestly my absolute favourite! And they’re perfect for when it’s getting cold out too. In Traditional Chinese Medicine, dried ginger is called Gan Jiang and is used in herbal medicine to warm the interior. Which basically means ginger produces a warming effect when consumed- this is great for boosting the immune system and fighting common colds!

I really like this recipe because it’s 100% plant based which means that there are no eggs, butter or dairy products. So if it makes you feel any better, these cookies are *healthier* than non-vegan gingerbread cookies πŸ˜‰ And you also get to enjoy all of the benefits from the real dried herbs used!

Here’s what you’ll need:

Ingredients:

  • 3 ΒΌ cups flour
  • 2 teaspoons baking powder
  • 1 tablespoon powdered ginger
  • 1 tablespoon cinnamon
  • Β½ teaspoon ground nutmeg
  • Β½ teaspoon ground cloves
  • ​¾ teaspoon salt
  • ΒΎ cup vegan butter (room temperature)
  • ΒΎ cup brown sugar
  • ΒΎ cup unsulphured molasses
  • 1 teaspoon vanilla extract

Preparation time: 15 minutes prep time + 8 minutes bake time per batch of cookies

Serving Size: Makes about 36 medium sized cookies

Directions

  1. In a medium sized mixing bowl, add in the flour, baking powder, ginger, cinnamon, nutmeg, cloves and salt. Mix and set aside.
  2. In a separate large bowl, add in the butter and brown sugar. Use an electric mixer to beat until smooth (you should see no brown sugar clumps!) Add in the molasses and vanilla and continue mixing until uniform & creamy.
  3. Begin adding the flour mixture to the butter mixture, one spoonful at a time while beating with the electric mixer. Make sure you scrape down the sides with a spoon.
  4. As the mixture starts forming a dough, use hands to knead.
  5. Once dough is formed, preheat the oven to 350Β°F/175Β°C.
  6. In the meantime, sprinkle a flat surface and rolling pin with flour.
  7. Place dough ball in the centre and roll outwards until it’s about 1/8 inch thick.
  8. Cut dough using cookie cutters, I used small and medium sized hearts but you can use any shape you want! The classic gingerbread man is very cute~
  9. Transfer cookie shapes to a baking sheet lined with parchment paper. These cookies don’t expand too much in the oven so you can place them about 1/2 apart.
  10. Bake for about 8 minutes.
  11. Let cool down a lil and enjoy while warm! You can also put them in a container and save them to snack on for a few days.

Quick Tips:

  • If you chill the dough for up to 3 hours, it will be much easier to handle and shape. It’s a good idea to chill it if you want your cookies to look more photogenic.
  • Make sure you use a larger bowl for the butter mixture because you need enough space to add the flour mixture in.
Recipes

Rainbow Sushi & Vegan Spicy Mayo

Rolling sushi is so much fun and you’ll never want to order it again once you learn how to make it yourself! Homemade sushi tastes so much better and is much more cost efficient too. I also love this spicy mayo recipe because it’s simple and the chipotle pepper sauce can be substituted for sriracha or basic hot sauce.

When it comes to rolling your own sushi at home, don’t be intimidated. I used to use a bamboo mat, but I’ve found that rolling it with my hands on a cutting board or flat surface works so much better. It’s also a lot more sanitary too- sushi bamboo mats usually get rice and toppings stuck in them so I highly suggest just rolling it with your hands! It may take a bit of practice but it’s honestly worth it in the end.

Here’s what you’ll need:

For the sushi:

For the spicy mayo:

Ingredients:

  • 1.5 cups of rice (I used basmati)
  • 2.5 tablespoons of white vinegar
  • 1-2 ripe avocados
  • Half a large carrot, grated
  • Half a cucumber, cut into sticks
  • 1 package sushi seaweed
  • 6 tablespoons vegan mayo
  • 4 teaspoons chipotle pepper sauce
  • Chilli flakes (optional)
  • Salt + pepper to taste

Preparation time: 15 minutes to boil rice + 15 minutes to roll sushi.

Serving Size: Makes 3+ rolls depending on how much rice and toppings in each roll.

Directions for the sushi:

  1. Rinse rice until water runs clear and boil according to instructions on package.
  2. Once the rice is fully boiled, let cool for 5 minutes, add the white vinegar and cover. The vinegar helps the rice bind together and become more sticky.
  3. In the meantime, prepare toppings. Avocado works best sliced, carrots work best grated and cucumbers work best cut into sticks. However, this is your time to be creative so you can add all sorts of things to your roll!
  4. Prepare seaweed sheet by placing on a flat surface such as a cutting board.
  5. Start by taking a small spoon of rice and gently pressing it flat onto the seaweed sheet while spreading it out. The layer of rice should be generous- but not too thick otherwise it will be difficult to roll. (Check out the photos below for a reference!)
  6. Once the seaweed is covered with a nice layer of rice, add your toppings in a neat row. You want to try your best to stack your toppings in a way that will still allow the seaweed to fold over cleanly when you roll it.
  7. Start rolling in an outward motion with a firm grip on your toppings.
  8. Once you reach the end, press edge of seaweed to secure, slice and enjoy!

Quick Tips:

  • The rice should be slightly warm when you roll your sushi. If it’s too hot, the seaweed will crack so make sure you let it cool down a bit first.
  • Leave a strip of seaweed at the end so that your roll will stick together properly.
  • It’s best to use a serrated knife (the ones with the lil grooves). I’ve found that cutting sushi with a smooth or dull knife can really tear the seaweed apart.

Other than that, have fun trying out this recipe! The vegan spicy mayo tastes really great on burgers too πŸ˜‰

Recipes

Simple & Tasty Homemade Bread

I recently learned how to make my own bread at home and it’s so much fun! Don’t be discouraged- making bread is a lot easier than you think and once you learn the skill, you know it forever!

All you need for this recipe are 5 simple ingredients: flour, yeast, pink salt, sugar & olive oil. I add seed mixes to my dough, however this is optional and you can still follow the same instructions with or without the seed mix added.

Below you will find the recipe as well as instructions for each step of the way!


Ingredients:

  • 3 cups flour
  • Pinch of salt
  • 30 ml of olive oil
  • 1 cup + 50 ml water
  • 5 grams yeast
  • 2.5 grams sugar
  • 2 tablespoons seed mix (optional)

Preparation Time: 1 hour 45 minutes to rise + 45 minutes bake time.

Directions:

  1. Activate Yeast: In a small bowl or glass cup, stir the yeast into 50 ml of warm water. Add the sugar and let stand for 10 minutes. If mixture doubles in volume, it’s active.
  2. Add flour, salt, olive oil and water to a large bowl. Add yeast mixture and knead with your hands until a dough is formed. You may have to add more water or flour at this time to get the right consistency!
  3. Form dough into a ball, cover bowl and let rise for 45 minutes.
  4. Remove dough from bowl and lay on a flat surface. Try to push out all of the excess air with your fingers until it feels flat. Roll into a loaf shape.
  5. Once the shape of your loaf is formed let it rise for 1 hour.
  6. Put a small tray of water in the bottom of the oven and preheat to 390Β°F/200Β°C. The tray of water adds moisture to the bread and ensures that it won’t dry out while baking.
  7. Coat the top of your loaf with a bit of olive oil and add some sunflower seeds if you’d like. Put it in the oven and let bake for 45 minutes or until loaf appears golden brown.
  8. Remove from oven, let cool and enjoy!!